
How to Install Acoustic Wall Panels for a Flawless Finish

Share

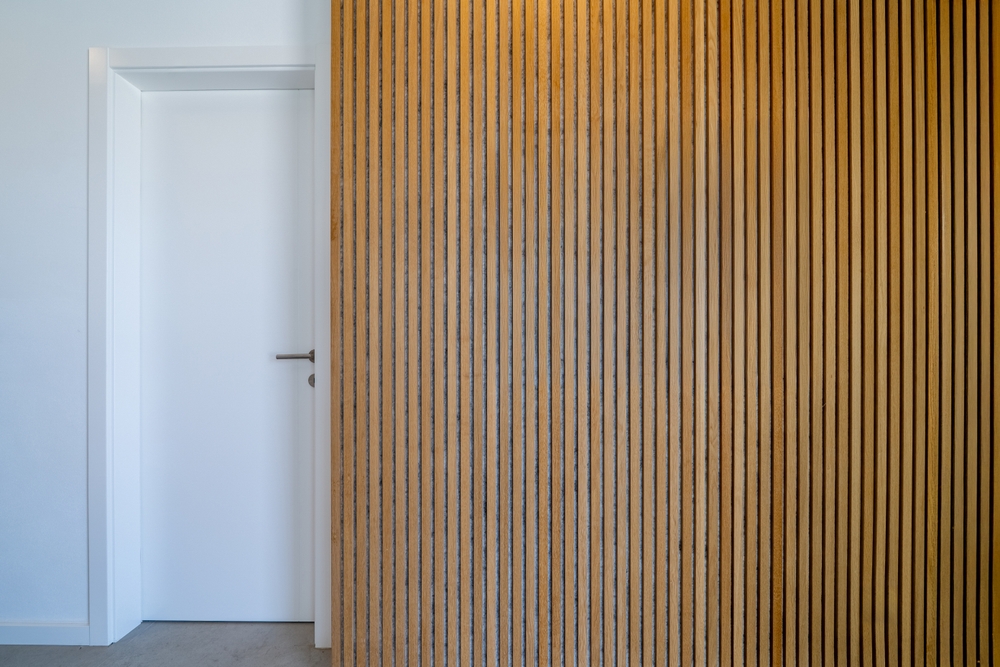
Acoustic Wall Panels: Choosing the Right Fixings for a Perfect Finish
Acoustic wall panels can transform a noisy room, but their performance depends heavily on what sits behind them and how securely they’re installed. A panel that slips, bows or lifts at the edges soon loses its clean appearance and may leave gaps that reduce its acoustic value.
Slatted panels bring extra challenges because timber, felt backing and wall surfaces behave differently under load. Before starting, check the panel weight, inspect the substrate and follow the manufacturer’s fitting instructions. Those practical details will determine whether the finished wall stays straight and secure.
The Mechanics of Acoustic Absorption
Sound reflects from hard surfaces such as plaster, glass and concrete. Acoustic panels reduce these reflections by allowing sound energy to enter a porous layer, where friction converts some of it into a tiny amount of heat. This overview of acoustic panel science explains how material composition and placement affect performance.

Slat walls combine a soft backing with a patterned face. The backing absorbs sound while the slats break up some reflections. Coverage matters too. One narrow decorative strip in a large room will have less impact than panels placed across a broad reflection point behind a television, desk or dining area. For a more technical explanation, sound absorption basics cover frequency, thickness and absorption ratings.
Why Gravity Defeats Quick Fixes
A panel may feel secure when first pressed onto a wall, yet gravity applies a constant downward load. Dust, loose paint or a slightly damp surface can weaken the bond over days or weeks. Heavy slatted panels also create leverage if the wall isn’t flat, concentrating strain around raised areas.
Prepare the surface before opening the adhesive. Remove flaky coatings, clean off dust and let the wall dry fully. Confirm that the chosen product suits both the backing and substrate. A suitable range of fixings & adhesives lets tradespeople and DIY users compare options for different building materials.
Mechanical support may still be required, especially on ceilings or tall installations. Never assume adhesive alone can carry a panel’s weight. Use the manufacturer’s specified fixing pattern and identify hidden pipes or cables before drilling.
Choosing Fixings & Adhesives for Slat Walls
Start with the wall type. Solid masonry, plasterboard and timber framing need different fixings, and a universal-looking screw may provide poor holding power in a hollow surface. On plasterboard, locate studs where possible. If the design requires fixings between studs, use anchors with a load rating suited to the combined weight of the panels.
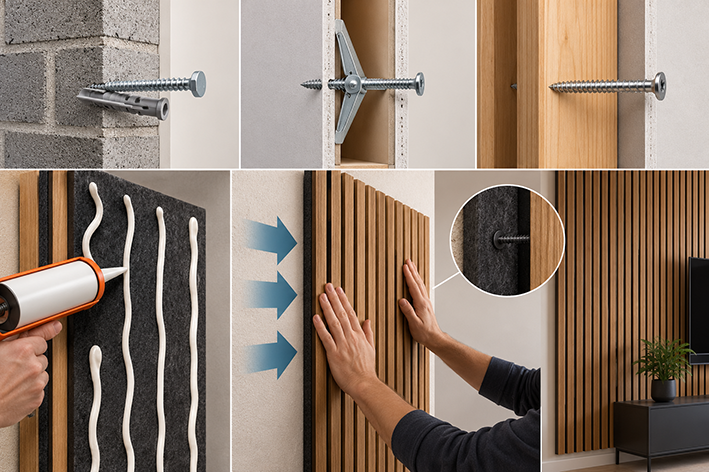
Adhesive choice also depends on compatibility. Some formulas grab quickly but allow little adjustment, while others need temporary bracing during curing. Check working time, full cure time and indoor-use guidance on the label. Apply adhesive in the recommended pattern so air can escape when the panel is pressed into place.
For slatted designs, put mechanical fixings through the felt backing where the manufacturer permits it. Dark screw heads can disappear into dark felt, leaving the finished surface tidy without relying on concealed glue alone.
Flawless Alignment on Uneven Surfaces
Measure the wall at several points because ceilings, corners and skirting boards are rarely perfectly level. Mark a true vertical datum with a spirit level or laser, then align the first panel to that line. If the first edge follows a crooked corner, every later joint will repeat and enlarge the error.
Dry-fit two or three panels before applying adhesive. This reveals uneven gaps, awkward socket positions and cuts that would leave a very narrow final strip. Small hollows can sometimes be packed according to the fitting instructions, while severely uneven plaster may need repair before installation.
Keep checking every second panel with the level. Timber slats create strong visual lines, so an error of only a few millimetres becomes obvious across a full wall. Use spacers where the product requires expansion clearance and wipe away exposed adhesive immediately with the cleaner recommended by its manufacturer.
Once the final panel is fitted, leave any braces in place for the full stated cure period. A straight datum line, compatible materials and properly rated support will keep those crisp vertical slats where you intended them to stay.